Unity 3D Post Processing | Synthwave Game Art
- Polycarbon Games
- Mar 18, 2020
- 3 min read

Updated: Mar 1, 2021

First we want to show you how to set up Post Processing for Unity 3D

Here is one of my scenes without post processing

Here is my scene without post processing.
How to Setup Post Processing for Unity 3D tutorial

1. The first thing you want to do is go to Window go to package manager

2. Next you want to wait about 10 seconds until package managers loads up all the packages. Then scroll down to post processing and hit Install on the Bottom right.


3. It nominally takes about 10 seconds to install.

4. Next you want to create Post Processing Profile

5. Name the post processing profile, in this case we are going to name it Demo for this demo.

6. Next we want to create a new game object. Go to GameObject --> Create Empty

7. You will notice the gameobject in your hierarchy

8. Name the gameobject, in this case we are going to call it Demo, for this tutorial.
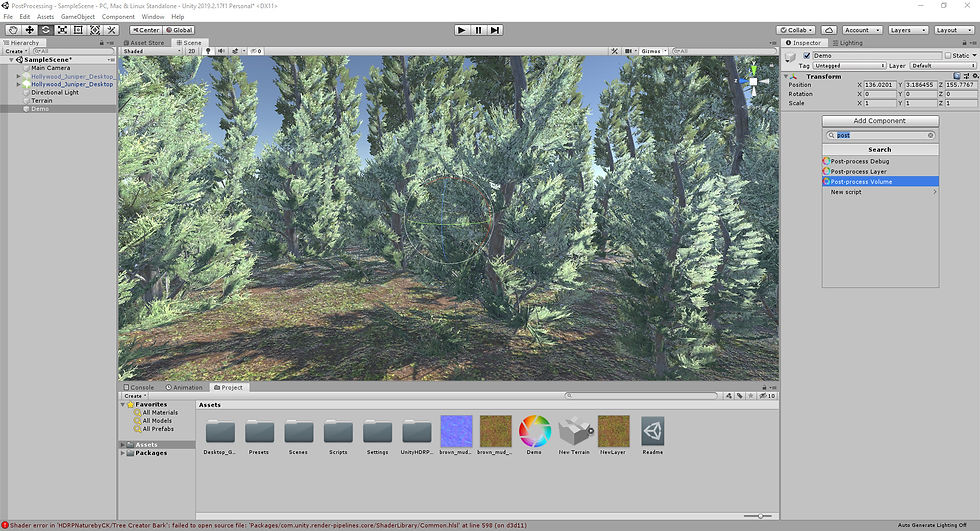
9. Now we are going to select our Gameobject we named Demo and go to our right to our inspector. Go to Add Component then add Post Processing Volume

10. Your inspector will look like this after adding the post processing volume.
Hit the check box that says "Is Global".

11. Next go to you Post Processing Profile and add it to the volume, you can drag and drop in the slot that says "Profile."

12. Now we have to setup our camera to render out the post processing. To do this Just go to you Camera then go to your inspector. Go to add component then add Post Processing layer,

13. In your camera setting in the inspector you want to go to the top right to Layers and add a new layer to handle the post processing.

14. Name the layer, in this case we are going to name it demo.

15. Set you camera layer to demo

16. Then you want to set the Post Processing layer to render to Demo in your camera settings

17. Now we want to go to our Post Processing volume in our hierarchy. Then we want to go to the inspector and set the layer of the post processing volume to the Demo layer.

Now you can start adding your effects.

You have a lot of choice to use for you scene
Bloom
Ambient occlusion
Color grading
Lens distortion
Chromatic abbreviation
And more

We worked on some more Synth Ball graphics. We are going with a simple modular approach with mostly abstract shapes, buildings and other sci-fi objects. We looked it sci-fi art from the 70's and 80's for inspiration. What you are looking at is the first level. For this level we used the Post Processing script. The overrides we are using are the following

Ambient Occlusion
Auto Exposure
Bloom
Color Grading
Below you can see some of the settings I have in this scene I also used the unity fog settings. We may experiment with Volumetric fog later, but for now we are using the Exponential Squared fog settings. Setting up the Sythwave scene. More detail about this can be found here.

Here is a video on how we setup post processing in Unity 3D
As far as the skybox we are using the Skybox Pack 8k UHD. We will optimize this for mobile later on. But the Skybox pack we got really brings everything together in our scene. Stay tuned for more progress.


Comentarios